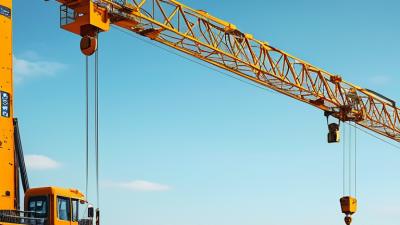

Why Choose a Lattice Boom Crane for Heavy Lifting?
Heavy lifting demands more than impressive capacity. It requires stability, planning, and equipment matched to real site conditions. A lattice boom crane offers a practical solution for demanding construction, infrastructure, energy, and industrial projects. Its open steel boom combines strength with relatively low weight, helping crews achieve substantial lifting reach without relying on a solid, heavily reinforced structure.
The design also supports flexible boom configurations. Operators can adjust boom length, jib arrangements, and counterweight systems for different lifting plans. On a busy project site, this flexibility may reduce equipment changes and improve workflow. A lattice boom crane can lift bridge sections, tower components, precast beams, and large machinery with controlled movement. However, capacity charts never replace professional judgment.
Ground conditions matter greatly. A long boom can create significant radius and wind challenges. Assembly may require additional cranes, skilled riggers, and carefully prepared access routes. These requirements can increase cost and setup time. No crane is perfect. That assumption can fail.
Experienced lifting teams study load weight, center of gravity, radius, weather, transport limits, and nearby structures before mobilization. They also verify manufacturer guidance and local safety requirements. This disciplined approach makes the crane’s advantages more reliable in practice. The following discussion examines why lattice boom cranes remain valuable for heavy lifting. It also considers their limitations, operational demands, and the decisions that determine safe, efficient performance.
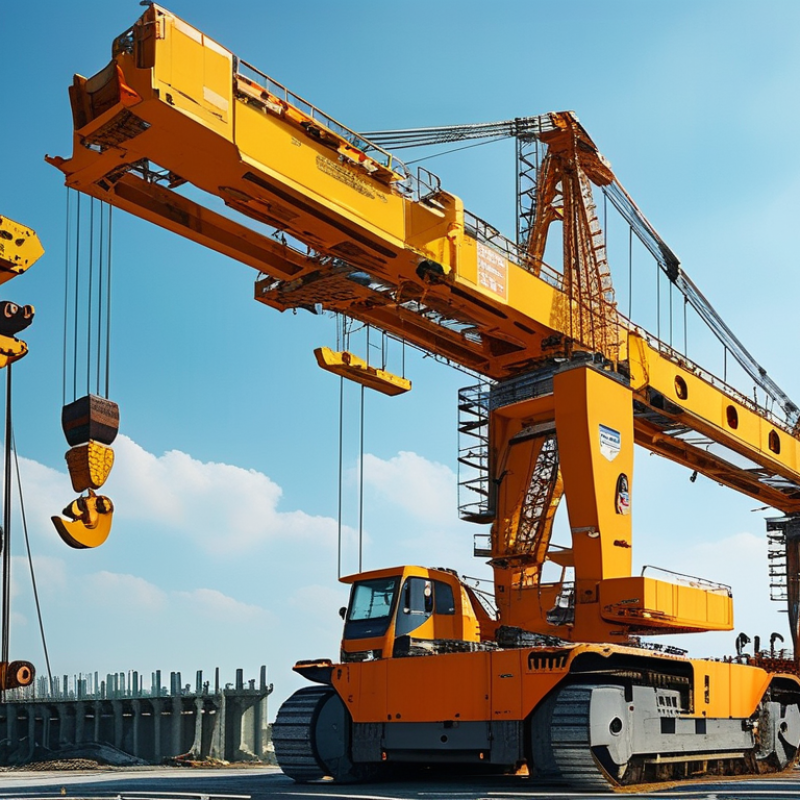
What Is a Lattice Boom Crane?
A lattice boom crane uses an open steel framework instead of a solid telescopic boom. Its boom sections connect like a strong, lightweight tower. This design gives the crane excellent lifting height and reach on demanding construction sites. Crawler-mounted models can travel slowly with heavy loads, while fixed versions often support long-term industrial work. The crane’s capacity depends on boom length, working radius, counterweights, ground conditions, and load position.
From practical lifting work, the lattice structure offers a useful balance between strength and weight. Operators can add or remove boom sections for different tasks. However, setup takes time and careful planning. A longer boom does not automatically mean better performance. Wind can affect stability, especially when the boom rises high above open ground. Engineers should review load charts, ground pressure, assembly procedures, and communication plans before lifting begins. Small mistakes can become expensive.
Tips: Inspect every connection pin and locking device. Keep the assembly area level and clear. Check wind conditions continuously. Use a qualified operator and trained rigging crew. Do not rely on appearance alone; a crane may look stable while ground support is weakening. It is wise to pause when conditions change, even if the lift seems routine. That pause may feel unnecessary, but it often prevents a serious error.
How Does a Lattice Boom Crane Work?
Why Choose a Lattice Boom Crane for Heavy Lifting?
A lattice boom crane works through geometry, tension, and controlled movement. Its boom uses lightweight steel sections connected into a rigid triangular structure. This design provides high strength without making the boom excessively heavy. Hoist ropes pass over sheaves at the boom tip. Winches then raise, lower, and position the load.
The crane’s operating radius changes its lifting capacity. A longer boom usually reaches farther, but it also creates greater overturning forces. Counterweights, crawler tracks, ground pressure, and boom angle must match the load chart. A signal person watches the load while the operator monitors movement and changing site conditions. Wind matters too. A suspended load can swing like a pendulum.
The International Labour Organization reported 2.78 million work-related deaths and about 374 million non-fatal injuries annually in its 2019 safety report. That figure includes many industries, but it reinforces one point: planning cannot be treated as paperwork. One small admission matters. A capacity chart is not self-executing.
Tips: Check ground bearing capacity before assembly. Inspect pins, pendant lines, sheaves, and wire ropes. Confirm the exact load weight, radius, and lifting path. Stop the lift when wind, visibility, or communication becomes uncertain. A second review often catches the detail everyone missed.
Which Heavy-Lifting Tasks Suit Lattice Boom Cranes?
Lattice boom cranes suit heavy-lifting tasks where load weight, working radius, and ground conditions challenge ordinary mobile cranes. Their assembled boom provides efficient strength with relatively low structural weight. Crawler-mounted versions can travel slowly across prepared sites while carrying selected loads. Not every heavy lift fits. They need substantial assembly space, transport planning, and firm bearing surfaces. A crane supervisor should verify soil pressure, boom configuration, radius, and wind limits before approving the lift. That process reflects practical experience, not paperwork alone.
They are strong candidates for setting bridge girders, refinery modules, power-generation components, and large precast sections. Offshore support yards may use them for repetitive lifts near quaysides, provided the ground and weather remain controlled. Long boom configurations help place loads over obstacles or into deep construction zones. Heavy counterweights and crawler frames also support slow repositioning between planned pick points. However, a confined urban site may favor a more compact crane. Bigger is not automatically safer.
The best applications have predictable pick paths, enough assembly room, and schedules that tolerate setup time. Lift plans should include load charts, rigging capacity, exclusion zones, communication methods, and contingency actions. Experienced teams inspect pins, pendants, wire rope, and crawler tracks before each shift. Small defects matter. Field reviews often show schedule pressure. Crews may skip a second ground check, and that shortcut can undermine careful calculations. Even accurate charts cannot compensate for soft fill, sudden gusts, poor tag-line control, or an underestimated load center. Soft fill can shift under crawler tracks without warning.
What Are the Main Benefits and Limitations?
Why Choose a Lattice Boom Crane for Heavy Lifting?
A lattice boom crane suits demanding lifts where reach, stability, and high capacity matter. Its open steel boom keeps weight relatively low while providing strong structural support. On large construction sites, this design can lift bridge sections, wind components, and heavy industrial equipment. The boom can also be extended for greater height and radius. From field experience, careful setup often matters more than advertised capacity.
The limitations deserve equal attention. A lattice boom crane usually needs considerable assembly space. Transporting boom sections can increase costs and extend preparation time. It also requires a firm, level working surface, especially when lifting near its maximum charted capacity. Wind creates another concern. Long booms can act like large sails, reducing safe operating margins. A small planning error may affect the entire lift. That reality is easy to underestimate.
Tips: Check the load chart, ground conditions, boom length, and weather forecast before mobilization. Confirm every connection and inspect wire ropes before lifting. Keep a clear exclusion zone. Do not treat rated capacity as a target. Leave a practical safety margin. Experienced crews still review the lift plan, because conditions change and assumptions can be wrong.
How to Select and Operate One Safely
Why Choose a Lattice Boom Crane for Heavy Lifting?
Choosing a lattice boom crane starts with the lift, not the machine. Review the load weight, radius, boom length, height, and ground conditions. Use the current load chart for the exact configuration. A qualified lift planner should verify every calculation. Do not guess. Consider transport limits, assembly space, overhead hazards, and wind exposure before mobilization. A longer boom is not always the better choice.
Inspect the crane before each shift, including boom sections, pins, pendants, wire ropes, sheaves, brakes, and safety devices. Check that the ground is firm, level, and suitable for the planned loads. Outriggers, mats, or crawler tracks must sit correctly. Follow the operating manual and applicable site requirements. Keep inspection records clear and current. Small defects can become serious under tension.
During operation, use one designated signaler and a reliable communication method. Establish an exclusion zone around the suspended load. Lift smoothly, avoid side loading, and monitor wind changes continuously. Never allow workers beneath a suspended load. In practice, schedule pressure creates poor decisions. No plan is perfect. If the radius changes, stop and recalculate. I would rather explain a delay than explain a damaged boom. The operator should stop immediately when signals become unclear, the load swings unexpectedly, or ground movement appears. Safety depends on disciplined choices, even when the lift looks routine.
Why Choose a Lattice Boom Crane for Heavy Lifting? - How to Select and Operate One Safely
| Category | Selection or Operating Factor | Typical / Applicable Information | Why It Matters | Safe-Practice Guidance |
|---|---|---|---|---|
| Crane Configuration | Lattice boom design | A modular boom made from lightweight lattice sections, assembled to suit the required height and reach. | The structure provides high strength with relatively low boom weight and can be configured for different lift geometries. | Use only manufacturer-approved boom combinations, pins, pendants, inserts, and connection procedures. |
| Capacity | Rated capacity at the planned radius | Capacity varies with boom length, working radius, counterweight, reeving, configuration, and ground conditions; it must be taken from the applicable load chart. | A crane’s maximum advertised capacity is not its capacity at every radius or boom length. | Confirm that the gross load, including rigging and below-the-hook equipment, is within the load-chart limit at the full operating radius. |
| Load Planning | Gross load calculation | Gross load = lifted object + slings + shackles + spreader beams + hook block + other lifting accessories. | Ignoring accessory weight can cause the planned load to exceed the permitted capacity. | Use verified weights and include the heaviest credible configuration in the lift plan. |
| Working Radius | Horizontal distance from the crane’s center of rotation to the load center | The radius changes during lifting, booming, luffing, or traveling and is commonly greatest when the load is placed. | Capacity generally decreases as working radius increases. | Plan for the maximum radius, not only the initial pick radius, and verify clearances throughout the load path. |
| Boom Selection | Boom length and operating mode | Shorter booms typically offer greater capacity at a given radius; longer booms provide additional reach but may reduce capacity and increase clearance requirements. | The correct boom length balances reach, capacity, site access, and overhead clearance. | Select the shortest approved configuration that safely reaches the placement point while maintaining required clearances. |
| Ground Conditions | Bearing capacity and levelness | The supporting surface must withstand the crane’s imposed loads without excessive settlement, sliding, or loss of level. | Ground failure can destabilize the crane even when the load chart is correctly followed. | Obtain a competent ground assessment, use engineered mats where required, and keep the crane level within the manufacturer’s limits. |
| Wind Conditions | Wind speed and sail area | Long lattice booms and large loads can be affected by wind; allowable limits depend on the crane configuration and manufacturer instructions. | Wind can cause load swing, side loading, loss of control, or structural overload. | Monitor wind continuously, follow the lowest applicable limit, use tag lines when appropriate, and stop the lift when conditions exceed the approved limit. |
| Electrical Hazards | Overhead power-line clearance | Required approach distances depend on voltage and applicable local regulations; power lines must be treated as energized unless confirmed otherwise by the utility. | Contact or arcing can cause fatal electric shock and major equipment damage. | Survey the site before setup, establish an exclusion zone, use a dedicated spotter where required, and de-energize or relocate lines when feasible. |
| Rigging | Slings, shackles, hooks, and lifting points | Each component must have a legible working load limit suitable for the intended hitch, angle, temperature, and load geometry. | Sling angles and edge loading can substantially change component forces and capacity. | Inspect before use, protect slings from sharp edges, secure the load’s center of gravity, and never exceed the lowest-rated component. |
| Pre-Operation Inspection | Structural, mechanical, and control checks | Check boom sections, pins, pendants, wire rope, sheaves, hooks, brakes, controls, alarms, safety devices, fluids, and visible leaks. | Defects can reduce structural integrity or prevent the operator from controlling the load. | Complete and document the required inspection before each shift and remove defective equipment from service. |
| Communication | Signal person and operator coordination | Use an agreed hand-signal system or reliable radio communication; one designated signal person should direct the lift unless an emergency stop is needed. | Conflicting or unclear instructions can cause unexpected movement and struck-by incidents. | Conduct a briefing before the lift, confirm emergency-stop communication, and stop immediately if communication is lost. |
| Load Control | Trial lift and controlled movement | Raise the load only a short distance initially to confirm balance, rigging security, brake performance, and crane stability. | A controlled trial identifies problems before the load is moved high or far. | Lift smoothly, avoid shock loading and side pulling, keep the load as low as practical, and control rotation with suitable tag lines. |
| Exclusion Zone | Personnel and traffic control | The zone should cover the suspended-load path, swing radius, counterweight movement, pinch points, and potential dropped-load area. | People can be injured by falling loads, swinging equipment, or crushing hazards. | Barricade the area, restrict access, prohibit personnel beneath suspended loads, and maintain a clear escape route. |
| Operator Qualification | Training, authorization, and site familiarity | Operators and rigging personnel should be trained, evaluated, authorized, and familiar with the specific crane configuration and lift plan. | Safe operation depends on understanding load charts, controls, limitations, and emergency procedures. | Follow applicable legal requirements, site procedures, and manufacturer instructions; do not operate beyond documented competence. |
| Standards and Records | Inspection, maintenance, and lift documentation | Records commonly include inspections, maintenance, configuration details, load charts, lift plans, personnel qualifications, and incident reports. | Documentation demonstrates that the crane was selected, inspected, and operated under controlled conditions. | Apply the regulations and recognized standards required at the work location, and retain current records for the equipment and lift. |
Related Posts
-
What is a Lattice Boom Crane and How Does it Work?
-

2026 How to Choose the Best Truck Mounted Crane for Your Needs?
-

Best Steel Plant Crane Options for Your Manufacturing Needs?
-
Why Invest in Steel Plant Cranes for Your Business?
-

2026 Top Lifting Crane Innovations and Trends to Watch Out For?
-
How to Choose the Right Steel Plant Crane for Your Needs?